 0.0 |
 0.25 |
 0.5 |
 0.75 |

1.0 |
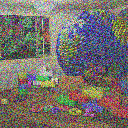
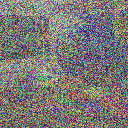
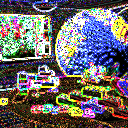
void R2Image::AddNoise(double magnitude);Adds noise to an image. The amount of noise is given by the magnitude in the range [0.0..1.0]. 0.0 adds no noise. 1.0 adds a lot of noise.
| 0.0 |
0.25 |
0.5 |
0.75 |
1.0 |
void R2Image::Brighten(double factor);Changes the brightness of an image by scaling the original colors by a factor and clipping the resulting values to [0, 1] (factor = 0.0: all black; factor = 1.0: original; factor > 1.0: brighter). See Graphica Obscura.
 0.0 |
 0.5 |
 1.0 |
 1.5 |
 2.0 |
void R2Image::ChangeContrast(double factor);Changes the contrast of an image by interpolating between a constant gray image (factor = 0) with the average luminance and the original image (factor = 1). Interpolation reduces contrast, extrapolation boosts contrast, and negative factors generate inverted images. See Graphica Obscura.
 -0.5 |
 0.0 |
 0.5 |
 1.0 |
 1.7 |
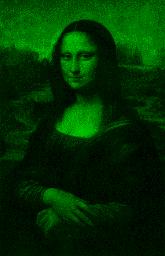
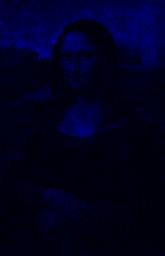
void R2Image::ChangeSaturation(double factor);Changes the saturation of an image by interpolating between a gray level version of the image (factor = 0) and the original image (factor = 1). Interpolation decreases saturation, extrapolation increases it, and negative factors preserve luminance but invert the hue of the input image. See Graphica Obscura.
 -1.0 |
 0.0 |
 0.5 |
 1.0 |
 2.5 |
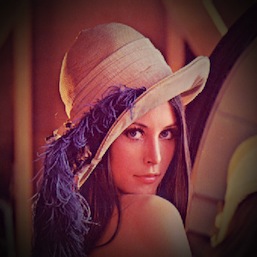
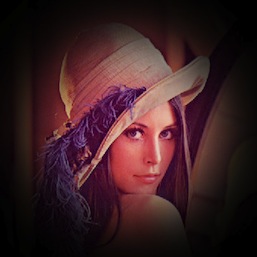
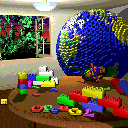
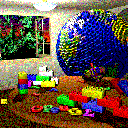
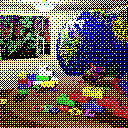
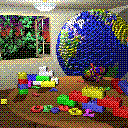
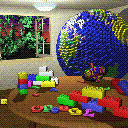
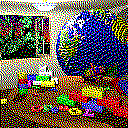
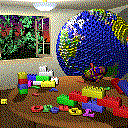
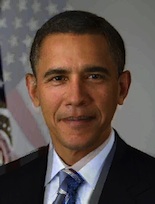
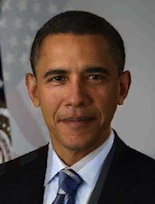
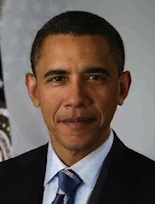
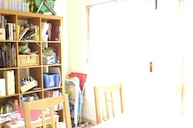
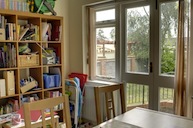
void R2Image::WhiteBalance(double red, double green, double blue);Adjust the white balance of the scene to compensate for lighting that is too warm, too cool, or tinted, to produce a neutral image. Use Von Kries' method: convert the image from RGB to the LMS color space (there are several slightly different versions of this space, use any reasonable one, e.g. RLAB), divide by the LMS coordinates of the white point color (the estimated tint of the illumination), and convert back to RGB. (Image source)

Before correction: too warm |

After correction: neutral |
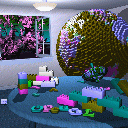
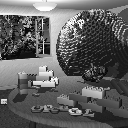
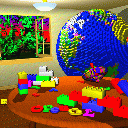
void R2Image::EqualizeHistograms();Increase the contrast of an image by "equalizing" its histogram, that is, remapping the pixel intensities so that the final histogram is flat. A low contrast image usually clumps most pixels into a few tight clusters of intensities. Histogram equalization redistributes the pixel intensities uniformly over the full range of intensities [0, 1], while maintaining the relationship between light and dark areas of the image. For a color image, convert to HSV and equalize the value channel. (UCI course notes, Wikipedia, image source)

Before |

After |

Before (color) |

After (color) |
void R2Image::Vignette(double inner_radius, double outer_radius);Darken the corners of the image, as observed when using lenses with very wide apertures (ref). The image should be perfectly clear upto inner_radius, perfectly dark (black) at outer_radius and beyond, and smoothly increase darkness in the circular ring between. Both radii are specified as multiples of half the length of the image diagonal (so 1.0 is the distance from the image center to the corner).
Original |
Inner: 0.707, outer: 1.414 |
Inner: 0.5, outer: 1.0 |
void R2Image::ExtractChannel(int channel);Extract a channel of an image. Leaves the specified channel intact. Sets all other ones to zero.
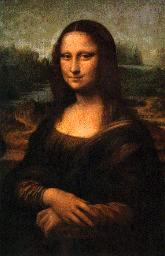 Original |
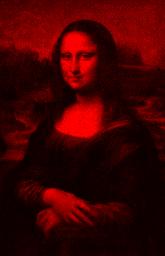 Red |
 Green |
Blue |
void R2Image::Quantize(int nbits);Converts an image to nbits bits per channel using uniform quantization.
The number of output levels per channel is L = 2nbits,
which are evenly distributed so that the lowest level is 0.0, the highest is
1.0. Every input value is to be mapped to the closest available output level.
 1 |
 2 |
 3 |
 4 |
 5 |
void R2Image::RandomDither(int nbits);Converts an image to nbits bits per channel using random dithering. It is similar to uniform quantization, but random noise is added to each component during quantization, so that the arithmetic mean of many output pixels with the same input level will be equal to this input level.
 1 |
 2 |
 3 |
 4 |
5 |
void R2Image::OrderedDither(int nbits);Converts an image to nbits bits per channel using ordered dithering. The following examples used the pattern
| Bayer4 | = | 15 | 7 | 13 | 5 |
| 3 | 11 | 1 | 9 | ||
| 12 | 4 | 14 | 6 | ||
| 0 | 8 | 2 | 10 |
 1 |
 2 |
 3 |
 4 |

5 |
void R2Image::FloydSteinbergDither(int nbits);Converts an image to nbits per channel using Floyd-Steinberg dither with error diffusion. Each pixel (x,y) is quantized, and the quantization error is computed. Then the error is diffused to the neighboring pixels (x + 1, y), (x - 1, y + 1), (x, y + 1), and (x + 1, y + 1) , with weights 7/16, 3/16, 5/16, and 1/16, respectively.
 1 |
 2 |
 3 |
 4 |

5 |
void R2Image::Blur(double sigma);Blurs an image by convolving it with a Gaussian filter. In the examples below, the Gaussian function used was
ceil(3*sigma)*2+1. original |
 0.125 |
 0.5 |
 2 |
 8 |
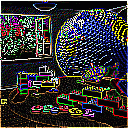
void R2Image::EdgeDetect();Detect edges in an image by convolving it with an edge detection kernel and taking absolute values. In the example below, the kernel used was
|
-1 |
-1 |
-1 |
|
-1 |
8 |
-1 |
|
-1 |
-1 |
-1 |
void R2Image::Convolve(const R2Image& filter);Read a kernel matrix from a text file and convolve the image with it. For example, here is a possible input file for the kernel, specifying an edge detection operation. The format of the file is "width height nchannels" in the first row, and then pixel values in row, column, channel order. Note that convolution can be used to implement a variety of image processing algorithms including blurring, sharpening, edge detection and thinning, by appropriate choice of kernel.
|
Original |
After convolution |
Image *R2Image::Scale(double sx, double sy);Scales an image in x by sx, and y by sy. The result depends on the current sampling method (point, bilinear, or Gaussian). In the example below, the size of the Gaussian filter is 3x3.
 Point |
 Bilinear |

Gaussian |
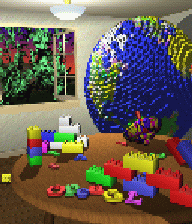
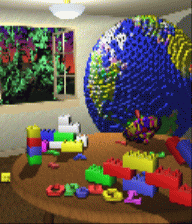
void R2Image::SeamCarve(int width, int height);Seam carving resizes an image, changing its aspect ratio while preserving the shapes of salient objects. The idea is to remove (for downscaling) or duplicate (with interpolation, for upscaling) pixels from "unimportant" regions of the scene, whose modification does not affect the important regions and is not easily noticeable. Follow the algorithm described in [Avidan07]. (Top image source)

Before |
After downscaling |
Before |
After upscaling |
Image* R2Image::Crop(int x, int y, int w, int h);Extract a sub image from the image, at position (x,y), width w, and height h.
|

Crop(42,147,85,93) |
Image *R2Image::Rotate(double angle);Rotates an image by the given angle, in radians (a positive angle implies counter-clockwise rotation) . The result depends on the current sampling method (point, bilinear, or Gaussian). In the example below, the size of the Gaussian filter is 3x3.
 Point |
 Bilinear |
 Gaussian |
void R2Image::Composite(Image *top, int operation);Composites the top image over the base image, using the alpha channel of the top image as a mask. You can use an image editor of your choice to generate the input images you need.
Base |

Top |

Alpha channel of top |

Result |
void R2Image::Fun();Warps an image using a creative filter of your choice. In the following example, each pixel is mapped to its corresponding scaled polar coordinates. The artifacts of point sampling are very noticeable in this example.
 Original |
 Point |
 Bilinear |
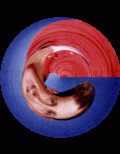
Gaussian |
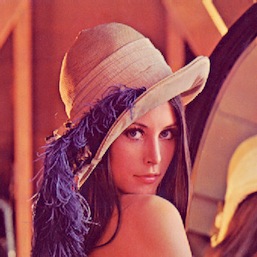
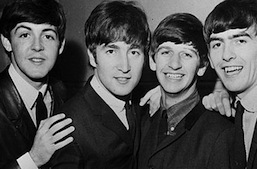
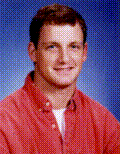
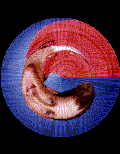
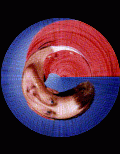
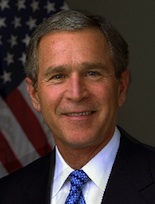
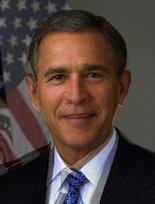
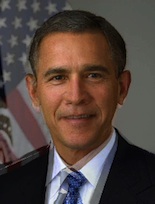
void R2Image::Morph (const R2Image& target, R2Segment *source_segments, R2Segment *target_segments, int nsegments,
  double t, int sampling_method);
Morph two images using [Beier92].
*this and target are the before and after images, respectively. source_segments and target_segments are corresponding line segments to be aligned. t is the morph time: a number between 0 and 1 indicating which point in the morph sequence should be returned.

t = 0 |
t = 0.11 |

t = 0.22 |

t = 0.33 |
t = 0.44 |
t = 0.56 |

t = 0.67 |
t = 0.78 |
t = 0.89 |
t = 1 |

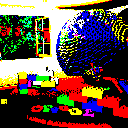
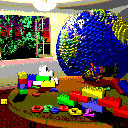
void R2Image::FuseExposures(int nimages, R2Image **images, double wc, double ws, double we);Combine multiple images of a scene into a single image, to accommodate scenes with high dynamic range or widely varying object depths. Each output pixel is an appropriate blend of corresponding input pixels, giving higher weight to input pixels that have greater "quality". The quality measure is the product of local contrast, saturation, and well-exposedness, the terms weighted by exponents wc, ws and we respectively. For combining multiple exposures, all three exponents should be non-zero. For combining a focus stack into an image where everything is sharp, set all exponents other than the sharpness parameter (ws) to zero. Follow the algorithm described in [Mertens07]. (Image source)

Lowest exposure |
|

|
Highest exposure |
Fusion result |